Showing posts with label lace tools. Show all posts

Monday, November 24, 2014

A little creative flare

With all our spare time, and a little healing, the creativity has finally visited our house again.
 
Colin has become well enough to play in the shed for a couple of hours at a time.
 
Although things that used to be second nature are now a big struggle, he has managed to construct this "surprise" plant Ferris Wheel for our garden from some of the 'junk' in our back yard.
 
It really does look even better in real life, and I will always treasure it!
 Overall, the garden is really looking a treat, despite the weeds trying to take over!
 And while Colin has been working, I have too.
 
After my stint on the lathe making bobbins, I have finally ordered my own kiln to anneal my beads.  It will be here around Christmas time and I cannot wait.
 
This has inspired me to play at the torch once again.
 
With my new marver, I am really happy with the more consistent sizing of the divider pin heads and I have actually enjoyed making several 'batches' of similar beads...there are 11 dot beads not pictured here from my work this afternoon, as well as the lovely lilac frit beads top left in this photo.
 Here are the 'new' snails, inspired by the prep work on the hedgehogs the day before.
 
It is not often a new idea works so well the first time, so I am delighted.

Thanks for your time to read this far, and hope you enjoy.
 
Maybe some lace next time....

Sunday, September 14, 2014

Around tuit at last

I have wanted to make an all lace shawl for such a long time...
 
It is finally started!
 I have made the bobbins and most of the beads!  The glass divider pins are also my own work :)
I even spun the wool from an old Corriedale fleece!
The shawl will be made in 3 or 4 panels, and the 1st is now under way.
I will source the pattern for you next time I post about this one...Colin is sleeping and I don't want to move and wake him :) 
Thanks for dropping by, hugs and warmest regards,

Sunday, February 9, 2014

Catching up

First things first!  This spider has made her home at my daughter's front door...now she wants to know what kind if spider and is it a nasty?  We live in Northern Tasmania, and she is near the bush.
 Doll number 4 is making progress.  All I need to do is add some lace to tidy up the shoulder then she will be ready to fire :)  Working in the heat yesterday was not much fun, so I hope she fires ok.  I did not make the lace for this one...but I am working on the lace for 1 down the track...
 I found this style of sleeve a real challenge, but the rest has been a lot of fun...I just hope the fabric sections work better this time!
 My gorgeous grandson starts big school this week.  Last week, we went shopping for his little brother's birthday and discovered that drink spiders are very yummy, and he is the perfect gentleman (only when he goes out with grandma though!  This pirate is his home id LOL).
 
His mum asked about a library bag, and when I told her I had bought some fabric ages ago, I was asked to make a library bag :)  The back is the same as the edge fabric! Hope he likes it LOL
 Finally, we have been discussing bobbins on the Australian Email ring I am a member of.
I promise some pics, so here they are...
 
These are all my own bobbins, spangled with my own beads.  There is Huon pine, Blackwood, Jarrah, Tas Hardwood and Silky oak.  My first bobbin (and bead) is the Huon pine bobbin 7th from the right on the bottom row...the yellow bead was the first bead I made.
 Here are some more of my own bobbins, but they do not have my beads on them as yet.
Colin made me the very top left bobbin...it is the only bobbin he has made, and calls it a cricket bat.  I made the one on the right to go with it and the pair make the best ever gimp bobbins.
These are my bead tile bobbins.  The top 4 bobbins were made by David Potter, a Tasmanian bobbin maker.  I made the bottom 4 bobbins.  The very top pair have the first tiles I made with the teacher.
I designed the other sets of tiles.
 Here are the other tiles, ready for the bobbins...when I get around to making/purchasing them...
The teacher provided the patterns for the top row and the pair on the right of the 2nd row. 
The rest are my designs...including the special ones to celebrate my engagement in February last year :)
 And here is a size comparison for you :)
 
If you have made it this far, thank you for stopping by.  I hope your neck of the woods is fair weather (or lots of lovely lace time) and good health...please drop a comment in the box before you go as I love to see what you think too.
 
Hugs til next time...may your threads never break and your pins never bend...

Sunday, February 20, 2011

Bead venture and bobbin roll

here is a sampling of my new venture.
You can find these and more at funkyglassbeads.blogspot.com
On to some sewing...I won this gorgeous fabric in a Gumlace raffle.
I have been planning to make a bobbin roll for some time, and finally got around to it last Friday evening.

This is the outside, opened out.

Here is the side that holds the bobbins. It holds 50 pair of bobbins.

It is very easy to make!
1. Cut your patterned fabric 75cm (29.5 inches) x 56cm (22.5 inches) and hem the 75cm edges.
2. Cut a plain piece of fabric AND a piece of light polar fleece fabric 74cm (29 inches) x 34cm (13.5 inches). Use quilters basting spray to adhere the polar fleece, then the plain fabric to the wrong side, center of the patterned fabric.
3. Turn the excess patterned fabric at the top and bottom over to form flaps, press and sew a seam allowance from the fold, top and bottom, making sure you catch the polar fleece and plain fabrics. (the seam under the date on the pic above)
4. Cut 2 strips of patterned fabric 75cm x 2.5cm (1 inch). Fold in half right sides together, and stitch across one narrow and the long edges. Turn right side out using a knitting needle or tie turner.
5. Pin ties (unstitched ends) 1/4 of the way across the narrow edge at one end, inside the turned down edges and sew along the seam allowance. Turn down the edges on the final end and sew down seam allowances.
6. Using a quilters guide, stitch along the flaps at 3cm (1.25 inch) intervals to form pockets for your bobbins (or pencils).


Hope these instructions are clear...if not, please let me know, and I will try to clarify any sticky bits :)

Monday, December 6, 2010

Bits and bobs

I spent the weekend in the shed...again!
This time my work was on the lathe :)
Here is my new lazy susan - this was the first bobbin I broke -
complete with a set of handmade beads. Timely, as I replaced my lazy susan with a needle pin and have been looking for a new handle! (I keep giving them away but this one will stay)
Here are the rest of the bobbins I made this weekend.
The inscription says:
Bobbin 1: Life without lace...
2010
Bobbin 2: ...I'm a frayed knot!
2010
On the right, you can see the other bobbin I broke. I intend to put it in my Kriss Kringle pack for my student's break up. The reciever can decide it they need a pricker or a lazy susan :)
I still have 2 sets to inscribe, but after 3 weeks of playing with open flames and molten glass with not so much as a singed hair, I burned my finger on the poker and had to pack up for the evening.
Now, I promised some lace in this post!
The tatting will have to wait until next time...I still have about an inch of chain to complete the final bookmark in my 25 motif challenge...
My bucks edge has stalled with Christmas drawing nearer at an alarming rate...
Tomorrow evening I will be delivering these wire lace necklaces.
They were designed by Lenka Suchanck.
I think I will have to make another for myself :)
They were so pretty I decided to use them to make my Christmas card cover for 2010.
Finally, I got to playing with some 1mm copper wire as LOML would love to see a wall decoration made in wire lace :)
More practice required but there are some possibilities here...stay tuned :)

Have fun, stay safe and please let me know what you think before you go.

Many hugs in this super busy time.

Saturday, April 11, 2009

A few lace tools

Greetings All,
This little lady has ruled my home for the past 15 years. Her name is Sox, but we may call her "Your Highness"! We moved 6 months ago, and she still thinks she can boss all the cats in the neighbourhood around ... mostly still fairs well, however, she has come home on the receiving end several times recently :( This morning she veiwed her loyal subjects from atop this very shaky fence post as I denied her the pleasure of playing with my bobbins. The only time she will grace my lap with her company is when I am tatting... she loves to chase the shuttle!
O.K. Now some lace... here are the tools I could not do without... aside from pillows, pins, prickings and bobbins of course! Left to right - A nail punch, stolen from the shed for pushing pins into the pillow, some curve bladed scissors for threads - could be sharper, but I will eventually find a good quality pair :), a pricker - made from dowel with a needle pushed into the end, a lazy susan - made the same as the pricker, but point end in the handle (made from a broken bobbin) and a bend close to the eye, threaded ready for use, a pin puller - made by a local bobbin maker and a small crotchet hook - especially made for tatting by milward shuttles (no longer available).
To use the lazy susan to make a sewing - first remove the pin and push the needle through the pinhole. Pull the thread to make a loop.
Next, pass 1 bobbin of the pair to be sewn through the loop. It is easier to pass the bobbin spangle first if you are using spangled bobbins. Here, I am sewing 2 pair, so I have passed 2 bobbins through the loop.
Pulling on the handle AND the thread tails, gently ease the bobbin threads through the hole to form loops with the bobbin threads.

Pass one of the remaining bobbins through each loop. Gently ease the threads up to remove the unwanted loops and ensure that they sit neat with the hole where the sewing was made. If finishing off a piece, you can tie a reef knot before trimming the excess thread. Darning the ends may also be necessary. When making a sewing to join pieces of lace together (as here) replace the pin and continue on.
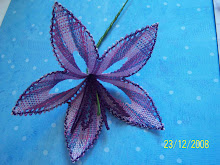
Here is my A with the first leg completed. I used basket weave stitch for this leg.
This afternoon I plan on completing some more ATCs so there should be another post soon. Are you interested in taking part in a round robin swap for ATCs? Please leave a comment!
From Sox and I...happy days :)